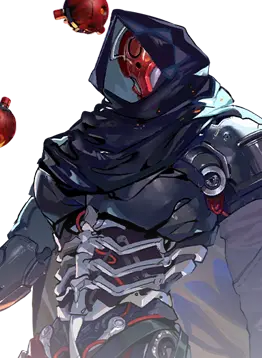
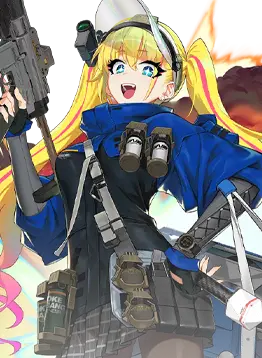
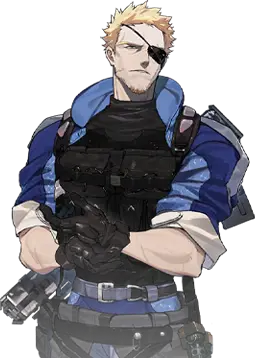
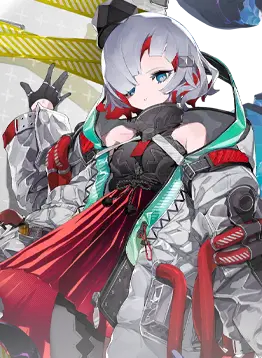
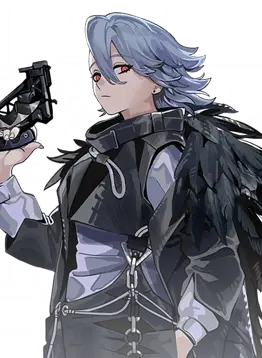
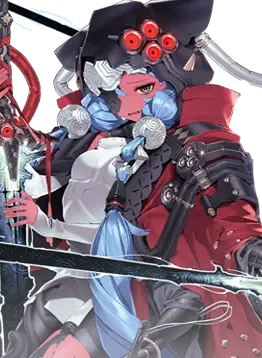
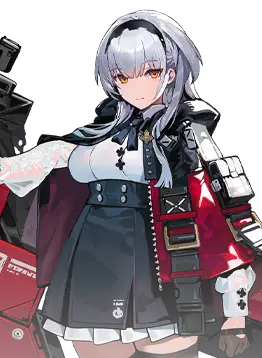
Best guide and build for Stella from Resonance Solstice. Stella is a SSR rarity character from the Support class and FirePhysical elements, who belongs to the Anita faction. Their position in combat is Front.
To learn more about Stella check the sections below. Use the tabs to quickly switch to the kind of information you're looking for.
Video guide
This character has no video guide yet.
Profile
Review
Teams
To learn more about Stella check the sections below. Use the tabs to quickly switch to the kind of information you're looking for.
Profile
Cards
TATAKAE
Type: S1 (Normal) | Cost: 0 | Amount: 2
Generates 3 [TATAKAU] in your hand.
TATAKAU!
Type: S1 (Derivative) | Cost: 1 | Amount: -
Deals 1 hit to the target and [Interrupt] them. When using any Red card, this card becomes [TATAKAU!!]. This card is [Destroyed] when played or discarded. DMG: 2100% (Physical).
TATAKAU!!
Type: S1 (Derivative) | Cost: 1 | Amount: -
Deals 2 hits of DMG to the enemy unit and [Stun]. Simultaneously triggers [Ignite]. After using any Red card, this card transforms into [TATAKAU!!!]. [Destroy] after leaving hand. DMG: 2100% (Physical) x1; 700% (Physical) x1
TATAKAU!!!
Type: S1 (Derivative) | Cost: 1 | Amount: -
Deal 3 hits of DMG to enemy unit and [Stun]. Simultaneously trigger [Ignite]/[Electrify]. [Destroy] after leaving hand. DMG: 2100% (Physical) x1; 700% (Physical) x2
Elegance
Type: S2 (Normal) | Cost: 0 | Amount: 2
Generates 2 [Selfie] in your hand.
Selfie
Type: S2 (Derivative) | Cost: 2 | Amount: -
Draws a card, prioritizing a Purple one. Increases all Front allies' ATK by 2%. This effect stacks. This card is [Destroyed] when played or discarded.
Stellar
Type: Ultimate (Normal) | Cost: 4 | Amount: 1
Form a [Stellar] environment, [Purge] all allies. Cost of all cards -1, lasts 12s.
Requirements: Consume 21 Cost.
Singing
Type: Ultimate (Derivative) | Cost: 0 | Amount: -
Restores 7 Cost. Cost restored in this way may exceed the upper limit. Inflicts [Corrupt] and [Confuse] on all enemies. Increases all allies' ATK by 3%. This effect stacks. This card is [Destroyed] when played.
Resonance
R1
Vigor
Type: Major
Playing a Stella's skill card restores 3% of Max HP.
R1.5
Battle Spirit
Type: Minor
Increases own [Basic Attack] DMG by 15/150%.
R2
Uplift
Type: Major
Whenever playing a Red card, increase the DMG of own Red cards by 10%, up to a maximum of 210%.
R2.5
TATAKAE
Type: Minor
[TATAKAE] DMG increases by 5/50%.
R3
Vitality
Type: Major
HP +35%
R3.5
Elegance
Type: Minor
Ally [Basic Attack] DMG increases by 5/50%%.
R4
Warm-up
Type: Major
After using [Selfie], increase the attack speed of all allies' [Basic Attack] to max for 6s, can be stacked.
R4.5
Stellar
Type: Minor
During the duration of [Stellar], all allies' Final DMG received reduces by 2/20%.
R5
Daffodil
Type: Major
Using [Leader Skill] generates a [Singing] at the top of your deck. This effect can only be triggered once.
Awakening
A1
Operations
Awakening 1
Increases your hand cap by 1 card.
A2
Hoshi no Hana
Awakening 2
[Stellar] lasts for 3 seconds longer.
A3
Battle Will
Awakening 3
ATK +150 DEF +150 HP +15%
A4
Battle Frenzy
Awakening 4
All [TATAKAU] are upgraded to [TATAKAU!!].
A5
<b>Pair</b>
Awakening 5
When playing 2 consecutive identical cards, draws a card, up to 7 times.
Profession Skills
Reso 1
Designated Goods Trading
Reso 1
Available quantity of Artificial Crystal +20.0%.
Reso 4
Star Power
Reso 4
Advertising promotion effectiveness +5.0%.
Reso 5
Star Power +
Reso 5
Advertising promotion effectiveness +10.0%.
Stats (Max)
HP
68530
DEF
685.3
ATK
685.3
Review
Review
Stella is a fantastic support that can reduce the cost of all cards in your deck while providing offensive buffs and spamming low-cost attack cards. Make sure you give her gear or bring healers, since she’s a frontline but NOT a tank.
Playstyle and Key Mechanics
Stella’s kit revolves around generating low-cost derivatives for her use to do damage; additionally, she can cleanse allies thanks to [Purge] and reduce the Cost of cards by 1. Let's further dive into her kit:
Main Cards:
Starting with her First card [TATAKAE], this generates 3 derivatives of [TATAKAU].
Next is [Elegance], which can generate 2 derivatives of [Selfie].
Lastly, her Ultimate [Stellar], which cleanses allies using [Purge] and reduces the cost of all cards by 1, is really convenient when dishing out combos.
Derivatives:
[TATAKAU] - This card upgrades into 2 stages every time a Red card is used while in hand. For the base [TATAKAU], it deals physical damage and applies [Interrupt] to the target. Next for the 2nd iteration, this now deals 2 hits and can [Stun] instead of [Interrupt] and also [Ignite]. Lastly, for the final upgrade, it can now deal 3 hits and is also able to apply [Electrify].
[Selfie] - Increases all front-line allies' ATK; this can stack infinitely and also can draw a card that prioritizes purple ones.
[Singing] - This card can generate Cost. The Cost generated can bypass the cap (12). Additionally, it [Corrupt] and [Confuse] all enemies to take more damage. Unfortunately, due to the strength of this card, you will only be able to use it once per battle. Unlocks at Resonance 5.
Investment
Further dupes for Stella can be impressive; however, simply for quality of life, it will be nice to have her at Awakening 2.
Awakening 1 - This permanently increases hand cap by 1; this doesn't require having any card of her card in hand, but her simply being part of the team.
Awakening 2 - Increases the duration of [Stellar] for 3 seconds, making it possible to use more cards at a lower cost.
Resonance
Resonance 1 - Heals her whenever you use one of her cards, a great node for survivability, given how squishy she is being in the front.
Resonance 2 - Improves all of Stella’s red card damage by 10% whenever a red card is used this can stack up to 210%
Resonance 4 - Increases Basic Attack speed to the maximum, as an additional effect after using [Selfie].
Resonance 5 - Now generates a [Singing] card on top of your deck whenever you use the Leader Skill. This can only be used once per battle.
Synergies
❗ ❗ ❗ The Synergies mentioned here are merely samples. Taking their core mechanics as an example, you can use many other characters as replacements or other synergies. ❗ ❗ ❗
Ganya - Ganya relies on Stella’s card generation to fuel her leader skill. Stella being able to create 2-3 cards at once makes her a valuable partner for Ganya.
Katas - As another frontline crew member, Katas greatly benefits on most of Stella skill’s starting of with [TATAKAU] the 2nd iteration of this derivative can greatly reduce the cooldown of Katas’ Leader Skill as you can use 3 of these, additionally given that Katas’ cards requires high cost Stella’s Ultimate Skill that reduces the cost, just simply improve the efficiency on using these cards.
Tennie - Tennie and Stella are quite similar when dealing damage, by using the same cards to deal damage at a low cost (referring to [Magnet Wheel] and [TATAKAU]. Thanks to Stella’s Ultimate Skill, she can just spam [Magnet Wheel] without worrying about the cost.
Arcana - A great support making her recover discarded cards, great for fishing [Stellar] for a longer cost reduction buff.
Connor - A great Tank to help Stella live, as we kept mentioning, Stella is too squishy. Connor bringing [Shield] to the table fixes that issue.
Rina Von - Another tank that can help Stella survive in the frontlines, by blocking incoming damage and applying control debuffs to the enemy.
Gear and Affixes
Some examples of overall good equipment choices for Stella. For specific picks, please check the respective teams.
Weapons:
UR Space Tangent: Draws 1 more card at the start of battle prioritizing own Ultimate card.
UR Kusa Ryujaku: Each time inflicting [Slash], ATK +0.5%, stackable.
SSR Ball Lightning: Whenever wearer's skill card is played, unleashes a ball lightning that [Penetrate] enemies, dealing damage once each time it hits enemies in its path and [Electrify] them.
SSR Unbewusstes Probe: Whenever you play a Red card of cost 3 or more, random enemy receive 3% less healing. This effect stacks up to a maximum of 75%.
SSR Electro DS Wood Sword: Whenever wearer inflicts [Slash], also triggers [Electrify].
SR Destroyer Torch: Own skill cards have a 10% chance to release an additional dazzling ray, dealing damage once and [Stun] the target.
SR Viscera Collector MK 0: Using [Leader Skill] restores 0.4 Cost. This effect stacks.
R Gardener Multi-Tool: Playing a Red card increases ATK by 0.5%. This effect stacks.
R Mass Projector: Using [Leader Skill] increases ATK by 1.5%. This effect stacks.
R Magic Wand: Playing a Purple card has a 20% chance to restore 1 Cost. The trigger rate stacks.
Armor:
UR Lucid Dream Fiber: Wearer's Red cards heal the wearer for 2% of the damage dealt.
SSR Simulated Stars: Using [Leader Skill] restores 5% HP. This effect stacks.
SSR External Memory Matrix: Max damage taken per hit is 33% of Max HP.
SSR Black Rock Armor: Reduces wearer's final DMG taken by 10%. This effect stacks.
SSR Mecha Armor: Whenever [Slash] / [Rend] inflicted by wearer deals damage, restores HP equal to 5% of the damage dealt.
SR Resonance Fiber: When own skill card is used, restores 2% of Max HP.
Accessory:
UR Dawncloud Seal: Max Hand Size +1.
UR Hulton Balloon: Draws a card after playing a 3-cost or higher Yellow card.
SSR Mobius: Cards in your hand are replenished 0.25 seconds faster. This effect stacks.
SSR Divinity Seal: Gains 2 Cost at the battle's beginning. This effect stacks.
SSR Fengshui Tactical Drone: For every 8 cards used, increases ATK or DEF by 2%, up to a maximum of 50%.
SR Magic Spring: Restores 0.02 Cost per second. This effect stacks.
R Harrison Device: Playing a Yellow card restores 0.3 Cost. This effect does not stack.
Affixes
Using [Leader Skill] restores 0.2/0.3 Cost. This effect stacks.
Using [Leader Skill] restores 2/3% of own Max HP. This effect stacks.
Using [Leader Skill] increases own ATK by 0.5/1%. This effect stacks.
Using [Leader Skill] increases own DEF by 0.5/1%. This effect stacks.
Increases own ATK by 1/3%. This effect stacks.
Increases own ATK by 10/30. This effect stacks.
Increases all own trigger rates by 1/5%. This effect stacks.
Restores 0.01/0.02 Cost per second. This effect stacks.
Playing a Red card increases own ATK by 0.2/0.5%. This effect stacks.
Increases final DMG dealt by 2/5%. This effect stacks.
Gains [Hyperarmor] for 1 second when using own skill cards. This effect stacks.
Playing a Yellow card restores 0.05/0.1 Cost. This effect stacks.
Playing a Yellow card has a 5/10% chance to draw a card. The trigger rate stacks.
Pros & Cons
Pros
Reduces the cost of all cards in your deck, allowing for faster rotations and helping high-cost-based decks.
Increases the damage output of everyone on the team thanks to her buffs.
Can spam low-cost attack cards, which have synergies with a lot of decks.
Cons
Extremely squishy frontline character. You need a healer or specific gear to keep her alive.
Ratings
T0
General Performance
T0
Eternal Scuffle
Best Teams
Best Teams
The teams below come from our Teams database and showcase ANY team with Stellapresent within in all content available in the game.
Ganya simply uses her leader skill to throw multiple axes, thanks to Fenia and Nayuta deck can cycle consistently by drawing cards, Stella can generate derivative cards to fuel Ganya’s Leader Skill. Suen to buff Ganya and heal the team, there's also a chance of her creating a [Shadowcraft] card, which can also be used as a fuel for Ganya’s Leader Skill. With the consistent card draw and generation make the Leader Skill is spammable.
Another variant for Ganya Axe Throw, but featuring an Awakening 4 Charlotte. Charlotte, at Awakening 4, can trigger a Doom Crescent whenever a Leader Skill is activated, given that Ganya can spam her Leader Skill. Charlotte also spams her Doom Crescent.
This team highly focuses on bursting enemies with Connor’s Leader skill; it has a slow build-up up given you have to activate her Leader Skill twice before being able to use the AOE nuke. Once set up, the rest of the team will just reduce its cooldown by using Red Cards.
Involves a lot of purple card spamming, which will also make Margiela spam her ultimate. Joshua, Verlaine and Arcana for cost generation, the former two are also sub-DPSes. Suen for more [Shadowcraft], Healing and Frontline. Extremely cost heavy, so get Using [Leader Skill] restores 0.2/0.3 Cost. affix on Anita equipments.
Katas' ultimate can be cycled in very fast when a lot of Fire units are present to inflict [Ignite], [Blaze], [Wildfire] and [Inferno]. It's essential to have Arina at Resonance 5 for her [Ignite] on auto-attacks, and although her Awakening 5 makes a big difference for its synergy with Red Cards, it's not an absolute must. For a budget option, you can switch Arina for Yoizuki.
Similar to the budget version, the team aims to keep Ilona at Sniping mode and using [Lock On] as often as possible. Having Stella and Nayuta in the team means a much faster cycling and card spamming, which can help in terms of DPS output from Livia and Achiwa as well.Not to mention, Nayuta's invisibility also buffs the target's ATK. The only downside in this team is the lack of healing, so if you're struggling to survive, you may consider switching Nayuta or Stella for Arcana, Yoizuki, Arina or a healer of choice.
WeaponNorthern ThornArmorSimulated StarsAccessoryMagic Spring
About the team
Overall Rating
★★★★
Complexity
★★★★
Team Cost
★★★★
Comment
A versatile team with Livia and Verlaine as the main Damage sources, and lots of utility. It can fit in any content or against any enemy easily, with the downside that it is quite RNG reliant, which can make its performance not as stable as other teams. For a more Premium version, Cecil can be switched for Arina. The main goal here is to have a steady source of Purple cards coming in order to use Strange Spark often.
The new high tier Electro team, taking Nicola's damage output to a whole new level thanks to Shizuru the Summer Chaser's buffs and faster card cycling. Tennie can be replaced for Nayuta or Yejue if you're not struggling with survival.
WeaponEnchanted SwordArmorExternal Memory MatrixAccessoryDivinity Seal
About the team
Overall Rating
★★★★★
Complexity
★★★★★
Team Cost
★★★★
Comment
A team that optimizes Nova and Supernova generation alongside stacking Shadowcraft. It's well balanced in terms of Card Draw and Cost Generation, making it a bit faster than the usual Shadowcraft teams, however, it lacks healing. You can try swapping Stella for Arcana and/or Margiella for Suen if needed.
A more improved version of the Nicola Electro Premium team, which features both Shizuru The Summer Chaser and Pelota with incredible Electro support. This team will now take advantage of Source Citadel armor as it won’t need to rely on Simulated Stars' affix of [Leader Skill] cost regen, so either External Memory Matrix or High Dimension Construct is a good option to have the [Leader Skill] ATK+ affix. However, if you still struggle with healing, you can consider using the regular Simulated Stars. For other gear alternatives, refer to each crew member’s review page for recommendations. This team will work fine with no awakenings. If you are looking for alternatives, refer to Team 23 and 34 as an alternative premium option.
Focuses on Connor nuking enemies with her leader skill. Mumei at A2 provides extra utility along with small heals. Caroline at A1 enables her to draw a card whenever the Leader skill is used. Stella is doing Stella things and Tennie is helping generate a Shield to hasten the transition of Connor’s Leader skill to Nova Impact.
A standard Mumei team utilizing basic supports to cycle the deck. Mumei’s Leader skill can be activated by obtaining Red, Green and Purple cards. We will capitalize on red card spam support to constantly activate it.
A basic Ikoma team that features high drawing capabilities and red card spamming. Stella's cost reduction should be enough to cover the cost regen deficiency, along with Aoba, who provides cost gen on discarding her improvisation 1. Yer for [Chill] or [Freeze] application.
A basic Kabaneri collab team with Mumei as the leader and Ikoma as a Sub-DPS. Stella generating Red cards and being able to draw purple cards helps a lot in reducing Mumei’s Leader Skill cooldown. Similarly, Shizuru and Arcana provide utility for the team to function
A Premium team consisting of Katas and Mumei as damage dealers. Nayuta and Stella for cycling the deck. Caroline to provide additional card draw when leader skill is used. Mumei at Awakening 2 can already provide decent healing to sustain the team.
Classic Connor Tennie comp featuring Paladi as some sort of sub-dps and enabler thanks to her having blue cards she can fit very well on this setup as more blue cards means easier time to proc Tennie’s Resonance 4 which gives shield upon using a blue card with a cost 1 or above, with this in mind generating shield means faster cooldown for Connor’s leader skill. Only play Caroline here if she has Awakening 1, simply for its drawing potential. Stella can be replaced by Nayuta, and for a budget option you can consider putting Arcana and/or Shizuru in either Stella and/or Caroline’s position.
A basic team for Paladi, having low-cost red cards to easily reduce leader skill cooldown. With this Paladi will be able to reach the max A-2SO summon(4) as fast as she could and even permanently stun the enemies. If it feels like there's a lack of healing, Rachel can replace Arcana. This team is capable of dealing with basic contents such as evictions and battle plans(except Fine Tune, Ops. and Pressure Test),expect this team to be viable on some contents, Please use a different setup on harder contents.
Paladi fits well in this by increasing damage mitigation and applying stat debuffs to enemies greatly helps the survivability of this team. Paladi can also apply [Wildfire], helping reduce Katas’ Leader skill cooldown, enabling her to spam [Purgatory Unleashed].
WeaponExtended TimelineArmorSimulated StarsAccessoryDivinity Seal
About the team
Overall Rating
★★★★
Complexity
★★★
Team Cost
★★★
Comment
Featuring Paladi as Leader, You are expected to have “HIGH” investment if you want to consider this team. It is costly from Awakening and UR Equipment wise. You can try it with lower investment but expect lower performance. Yejue can be substituted by Pelota.
A Classic basic team setup, this team utilizes the usage of Red Cards to keep Dustin generate Celestial Fire. Makes use of Anita gears as the team doesn't have a proper cost generator other than Arcana and Dustin
Sommer and Stella are a great combination as Sommer’s leader skill is activated as soon as the battle starts making it so that Stella’s [Singing] is instantly generated to start up the card cycling, this team is quite consistent from both drawing cards and generating cost.
Paladi and Dustin a great combo for explosion, this also makes use of the UR weapon Retraction Bomb MK3 that activates when certain number of explosion were inflicted, Paladi A2 is mandatory given thats where she can inflict explosion and as it is electrify, Caroline also benefits from it helping the cost generation of the team. Paladi is also equipped with the UR weapon Blue Illusion as Tennie is part of the team consistently generating shields whenever Blue Cards are used.
A reliable basic team setup for Sommer, this is a red card spamming team using low cost red cards to reduce Sommer’s Leader Skill cooldown. Badly needs cost regen from equipment to keep the spam consistent.
Functions by Joshua and Suen generating [Shadowcraft] for Sommer to destroy and increase her damage. Joshua Resonance 5 will be one of the cost regen sources along with Leader Skill Cost Regen Affix. Can bring A5 Rina Von instead of Suen if you want more consistent cost regen and draw.
This team functions by using a niche weapon - Dissection Tool C, which provides 1 cost whenever Discard Action is used. As we are using a lot of [Explosives] we take advantage of it by using Retraction Bomb MK 3 which triggers a massive explosion every 33 [Explosives] used. Dorothy and Heinrich are inseparable as they synergize very well, Stella is here for cost reduction, Shizuru for cheap [Explosive] cards and dustin for cost generation, draws and heal.
Anfiya is able to do her own Basic Attack plus White Birch, therefore equipping Blazefire Eroder will be essential to help proc more ignites. Anfiya also provides damage reduction with the help of [Mimic: Sand Phosphor], which affects all front allies.
Purple team that highlights Anfiya and her synergy on this team. Livia will be the primary sustain on this team as Joshua destroys black cards that are generated. This team utilizes the three generic purple cards, [Nova], [Shadowcraft] and [Strange Spark].
Features a consistent use of Anfiya's leader skill through the consistent draw of purple cards, awakening 2 of Anfiya is recommended for the coffin duration however it is also optional, do expect that it won't be a permanent lockdown as anfiya without awakening 2 will have less duration for the coffin.
A premium team if you wanted a DPS Jalhay, it is ideal to have more awakenings for her in order to do more damage however it should still work without awakenings as it will still have the same usage of cards. Shizuru the Summer Chaser and Dustin will be the sustain of the team and will provide a couple of utility such as drawing cards and generating cost.
WeaponViscera Collector MK 0ArmorSimulated StarsAccessoryDawncloud Seal
About the team
Overall Rating
★★★★★
Complexity
★★★
Team Cost
★★★★
Comment
A regular Sommer team with Ithos on it providing extra survivability by making allies cheat death upon taking lethal damage. If you think the healing still isn't enough you could always change the other character's armor to Mecha Armor.
Utilizes Shadowcraft to apply debuffs to reduce Shire's Leader Skill cooldown, Joshua provides additional cost generation and is responsible for shadowcraft generation as black cards gets destroyed.
A setup made with healing in mind, A2 Arina also has a chance to use Blackberry a skill that ricochets and applies confuse which Shire greatly benefits into.
A starter Lissandra team, highly reliant on Yer and Magic wand to generate cost. Stella for cost reduction. Thanks to Lissandra's non strict leader skill its easy to slot in common supports like Shizuru.
Takes advantage of additional damage for [Slash] upon hitting enemies with frost related status effects, Akira also boosts [Rend] and [Slash] DMG whenever [Kelvin Joke] is active.
With Hayabusa's cheap cards it can help trigger Charlotte's Awakening 2 that retrieves card whenever another cards except her own is used, Hayabusa's Awakening 2 also provide extra damage by being able to do follow up attacks, with Awakening 4 it provides Final DMG Taken debuff to the enemy targets. Alternatively you can play Hayabusa as the Leader instead for more control.
With Sommer's easy Leader Skill condition, Hayabusa makes his way into this team with his cheap red cards. Additionally Lissandra is also in the team to provide cost generation, a bit of defense and Shadowcraft generation to fodder for Sommer.
WeaponViscera Collector MK 0ArmorCrimson ProphecyAccessoryDawncloud Seal
About the team
Overall Rating
★★★★★
Complexity
★★★
Team Cost
★★★★★
Comment
Ushana Team that emphasizes on reshuffling cards by instantaneous draw and discard. In any case Summer Shizuru isn't available, She can be replaced with Rina Von but do expect a lower damage ceiling. Joshua mainly for destroying cards and reducing cost, Stella for Cost Reduction and generating Red Cards to contribute on Leader Skill Cooldown Reduction, and Nayuta for reshuffling. This composition can be easily run at low awakening but will need great investment towards the equipment.
An easy to run Raziel team, cost regen from Arcana and Valentine which also helps on Leader Skill cooldown by generatng Element Core: Fire and Ash cards additionally Stella and Rina Von are here for drawing cards.
As Raziel benefits from generating derivatves, therefore Shadowcraft will be utilized in this team. Joshua mainly for Cost Regen on destroying Black cards and Lissandra for generating derivatives through Quest, both can generate Shadowcraft as well. Stella and Jalhay mainly for generating low cost derivatives as well as card draw.
An Ushana team with Raziel as a sub-DPS. Raziel also provides some cost and does card draw which can help Ushana's Leader Skill Cooldown. This applies the same concept as the hypershuffle team by quickly generating and drawing cards.
An Ushana team that has Charlotte as a sub-DPS, Awakening 2 is mandatory so that Doom Crescent are retrieved whenever using another skill card. This applies the same concept as the hypershuffle team by quickly generating and drawing cards.
WeaponViscera Collector MK 0ArmorCrimson ProphecyAccessoryDawncloud Seal
About the team
Overall Rating
★★★★
Complexity
★★
Team Cost
★★★★
Comment
Raziel team with emphasis of generating Derivative cards, having Valentine makes Leader Skill always active with her Prayer card and the rest of the team are capable of generating their own Derivative cards at a low cost
Team Code
Additional information
For more information about team building, check the guide below:



 Fire
Fire  Physical elements, who belongs to the Anita faction. Their position in combat is Front.




















![Shizuru [Summer]](https://cdn.prydwen.gg/images/resonance-solstice/characters/shizuru-summer_card.webp)